Our Rustic Stair Banister is one of my favorite parts of our house!
Well, that and the kitchen.
And the foyer.
Okay, I like everything. Ha!
Here are the steps my handsome husband took to make this rustic wood banister! Can you believe he wrote all of these steps you will read below.
I told him he found his new calling, Home Blogger. 😉
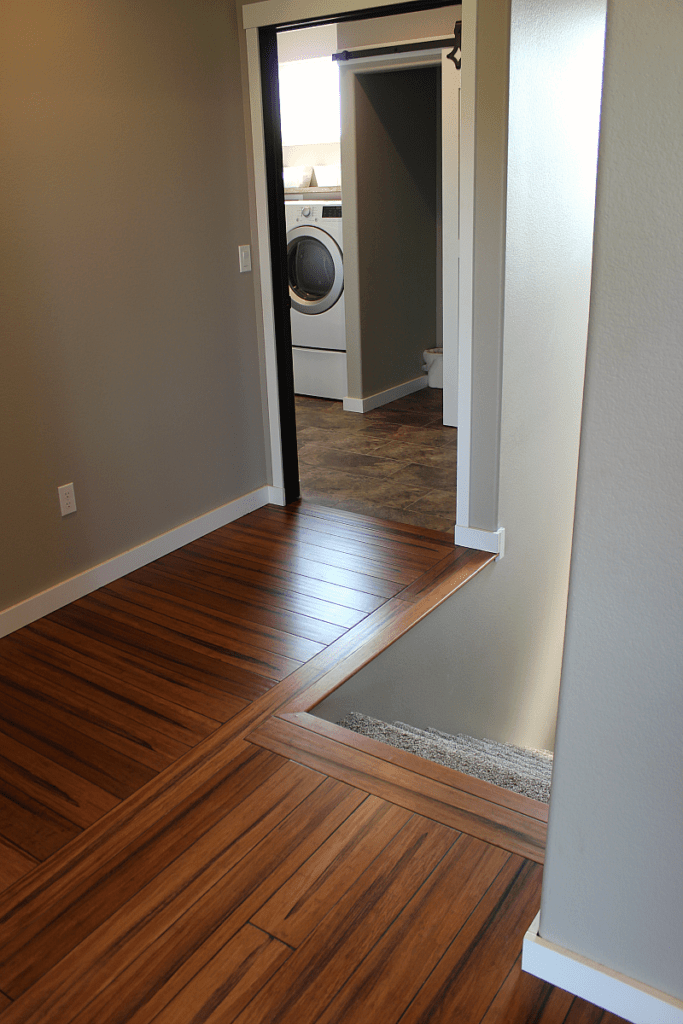
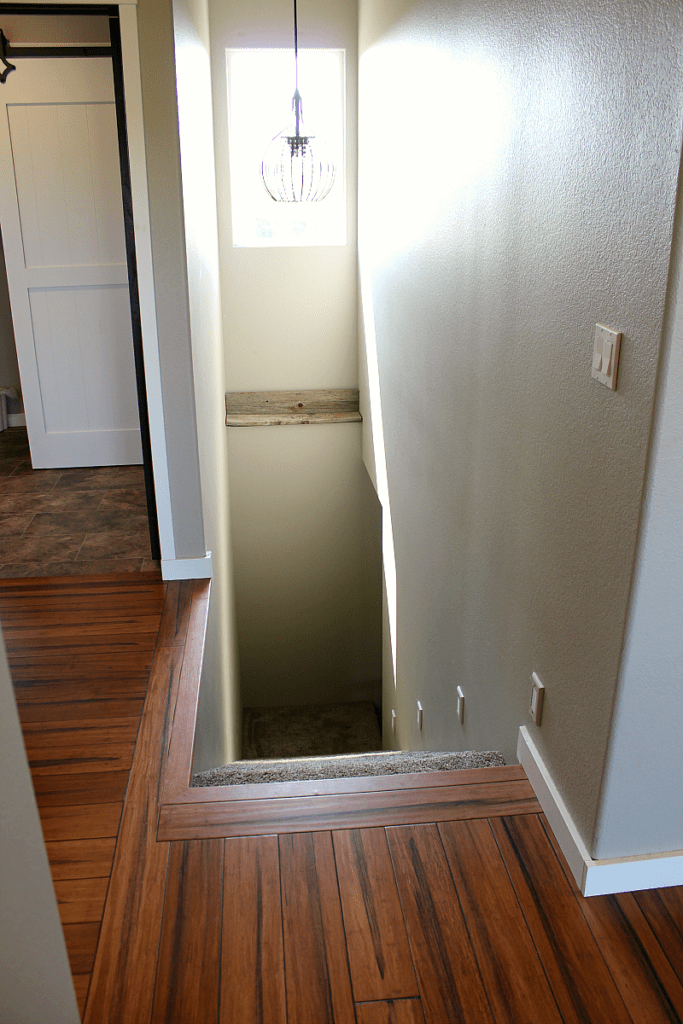
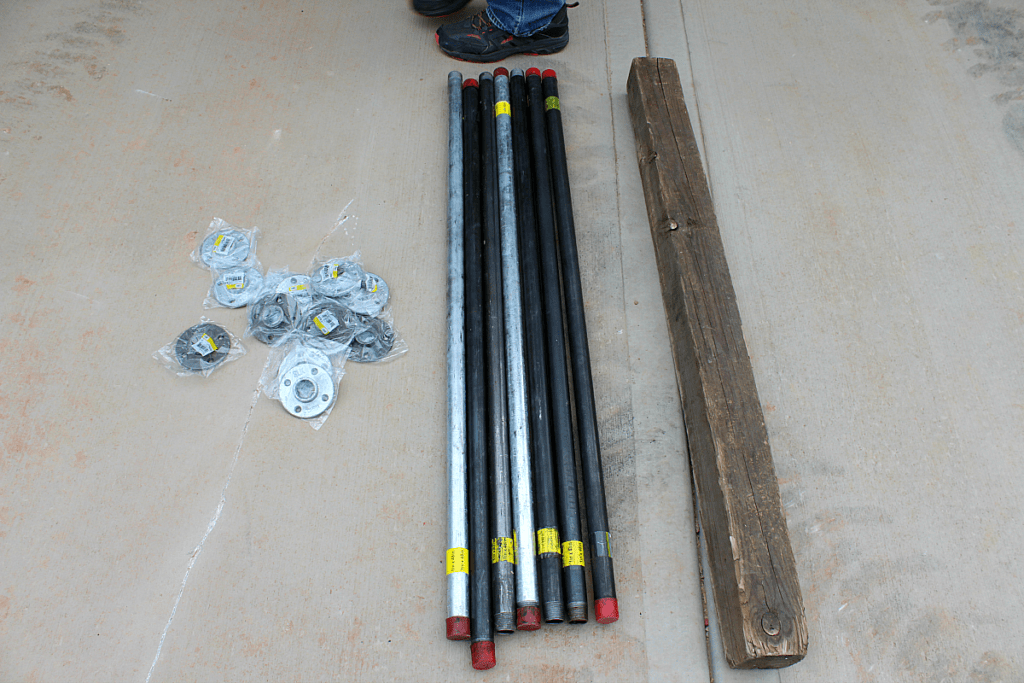
As you can see these are the “before” photos. Proud to say, not a single person or animal was harmed while this stairwell was exposed. #winning
This Rustic Stair Banister project is pretty straight forward.
Material used was a wooden banister, 7 steel pipes (black and galvanized), 14 wall flanges, hammered metal spray paint, small can of clear coat. We needed to cover the length of six feet so we bought 6′ pipe threaded on both ends, found at Menards or your hardware store. You’ll also need threaded wall flanges to attach to banister and wall.
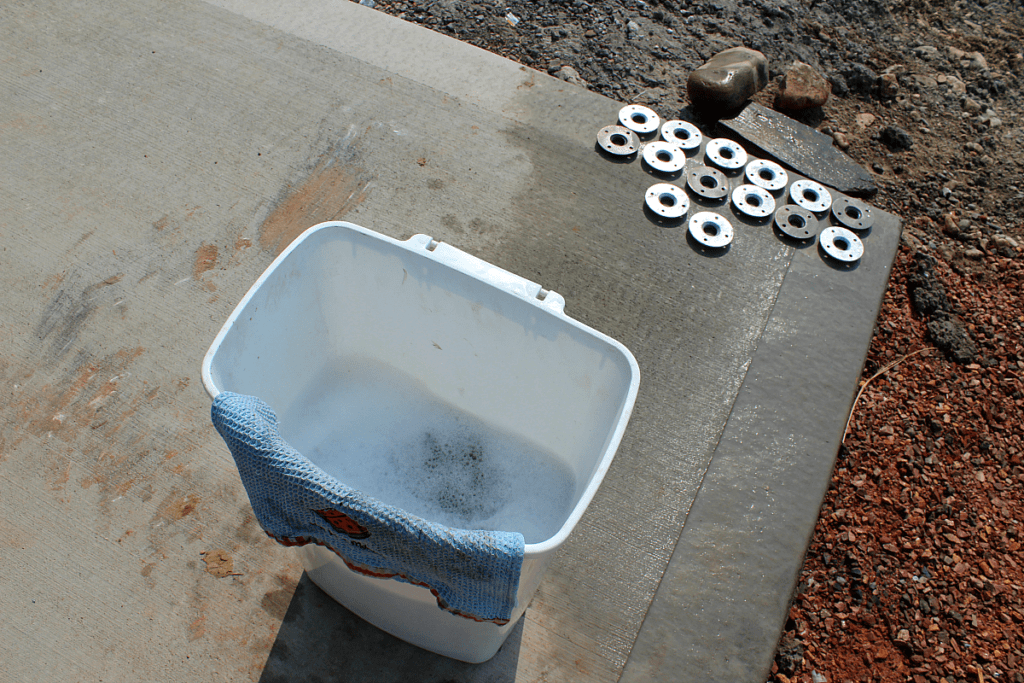
This next step is an important one.
Threaded pipe is oily and will not allow paint to adhere properly.
I used an old garbage can and dish soap, any degreaser soap will work. Be sure to remove all stickers and tape from the pipe, I had to use some goo-gone as well. 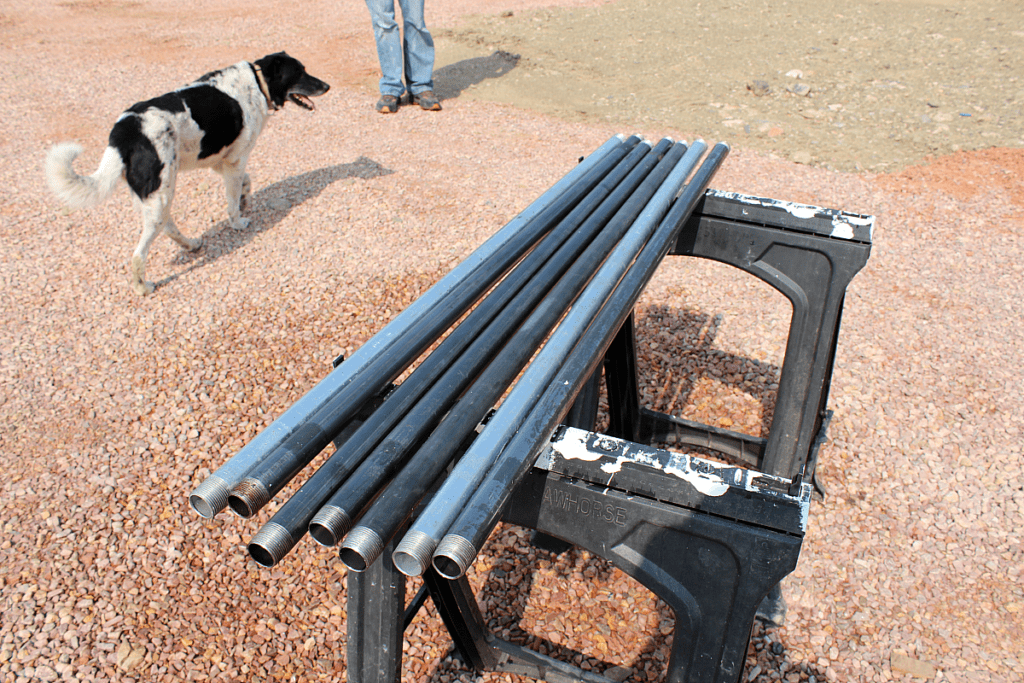
Allow all materials to dry properly and rotate them as needed. This shouldn’t take long especially when it’s 1000F outside.
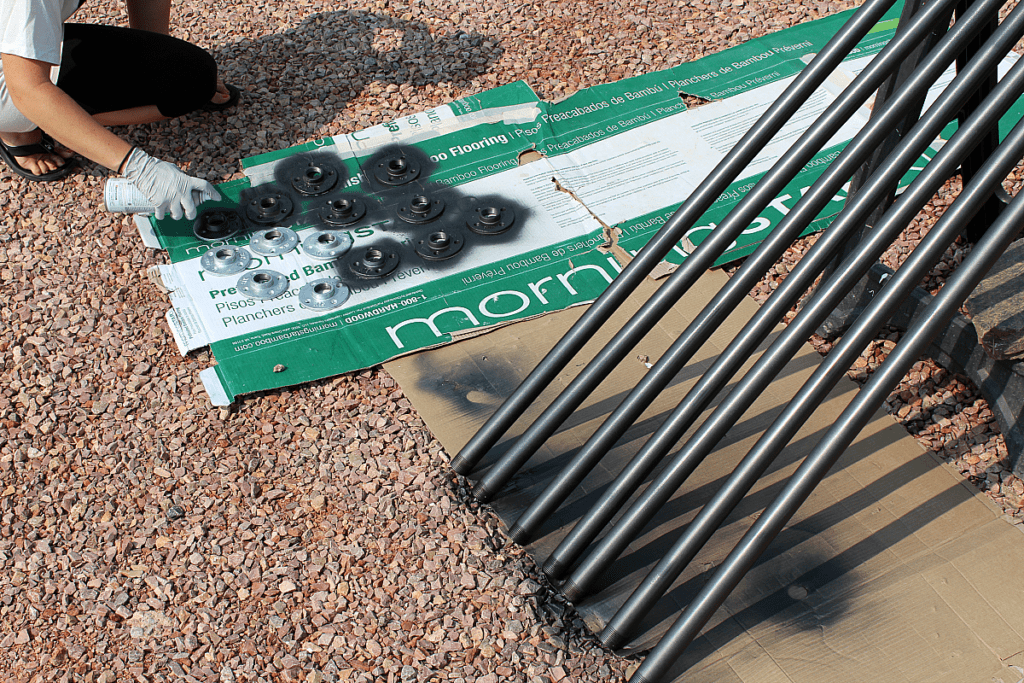
Then the paint process begins. We chose to use matte hammered spray paint in matte black.
I would recommend 2-3 coats to ensure good coverage and finish. 
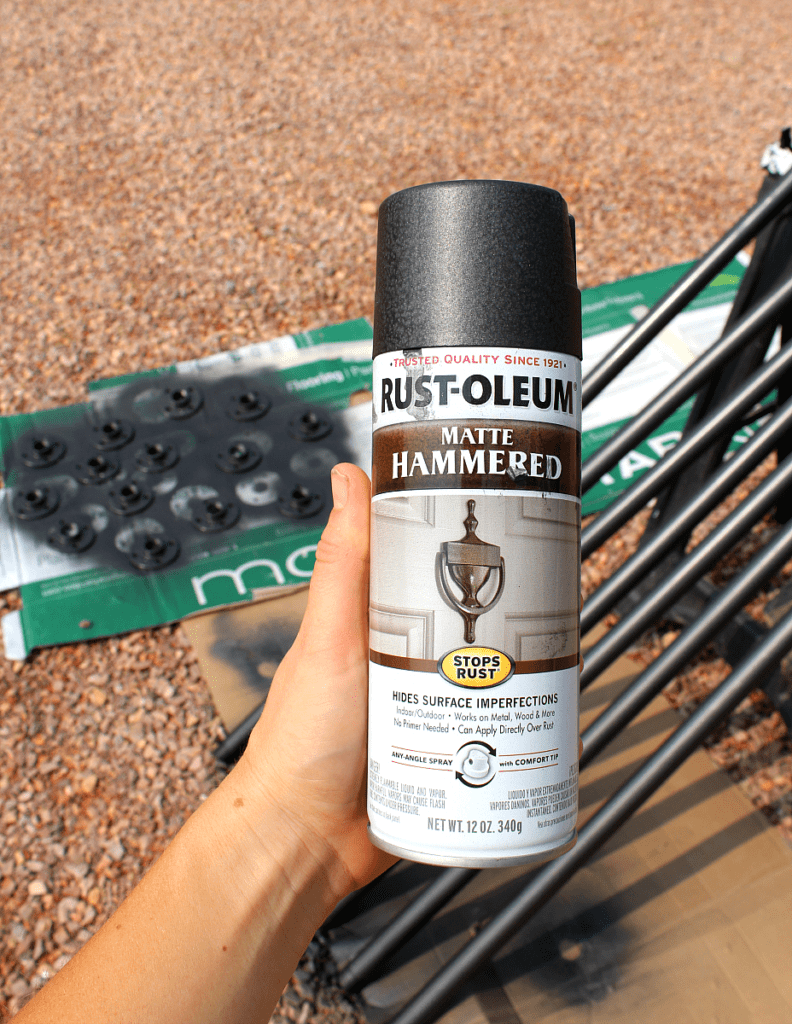
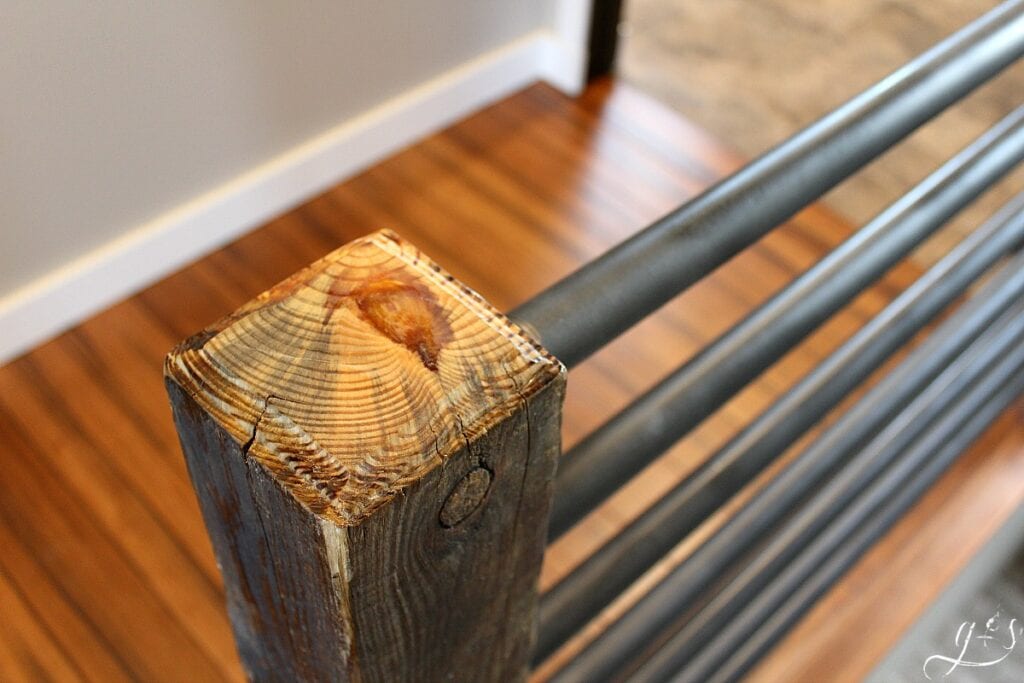
This paint went well with the theme of our house. We have the industrial- farmhouse – rustic – classic look going on. 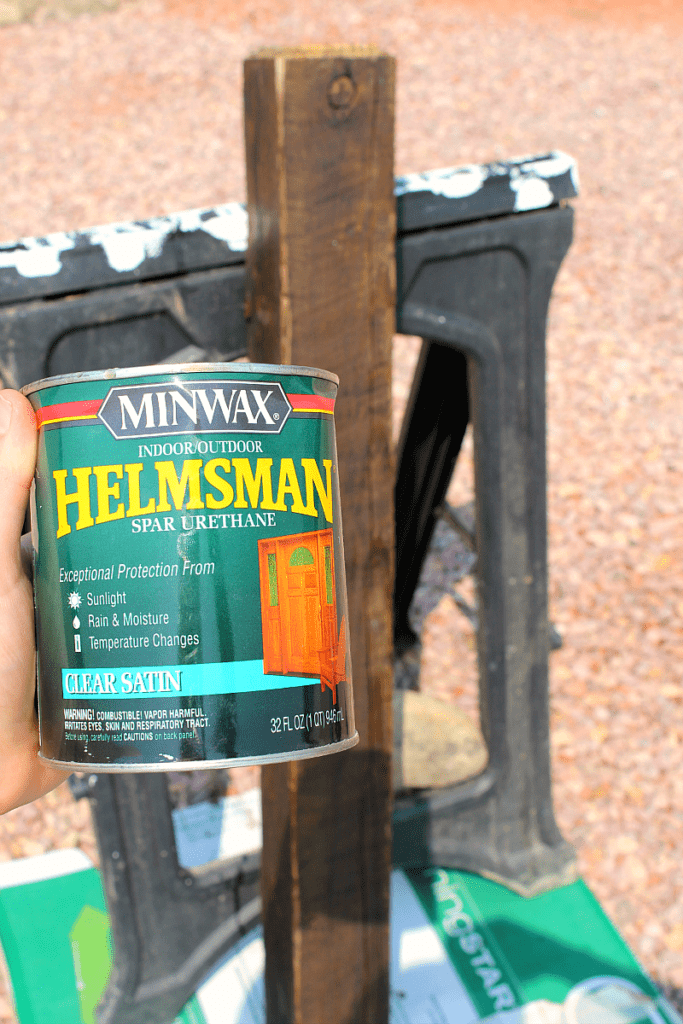 Now it’s time to fix up that crusty ole block of wood you found randomly at the lumber yard or sitting around the ranch. We found this by playing Jenga in the far reaches of the Menards lumber yard.
They had a huge stack of these timbers that were busted up and really no use to them.
They actually gave it to us for free! We needed a height of about 40 inches for our banister, but check with your local codes to be sure. We found this Minwax Clear Satin top coat worked well for many projects for our home. 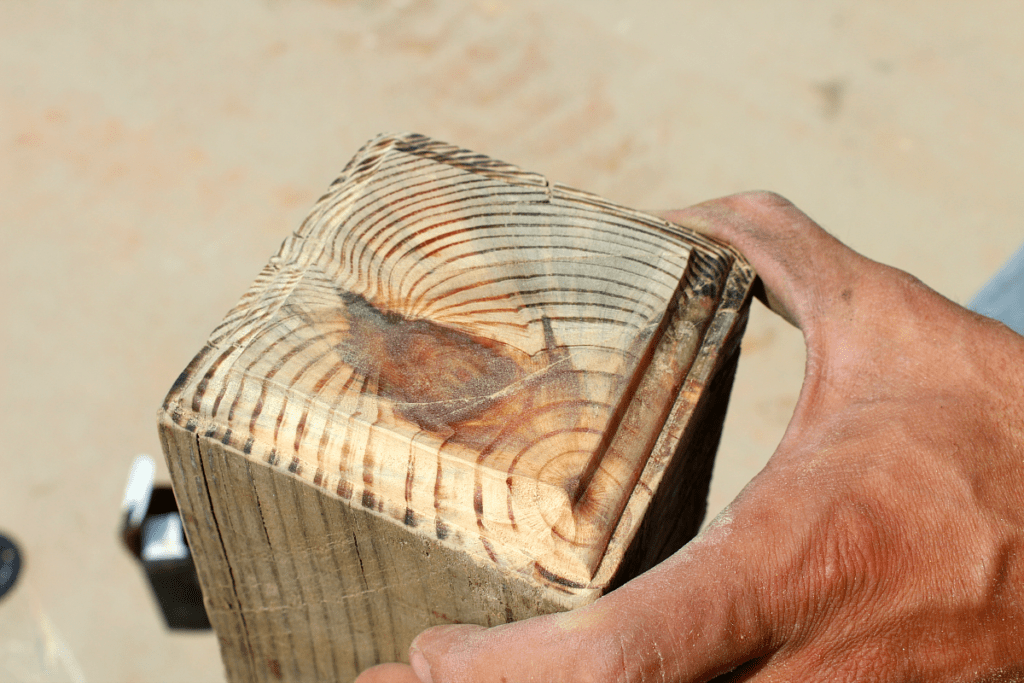
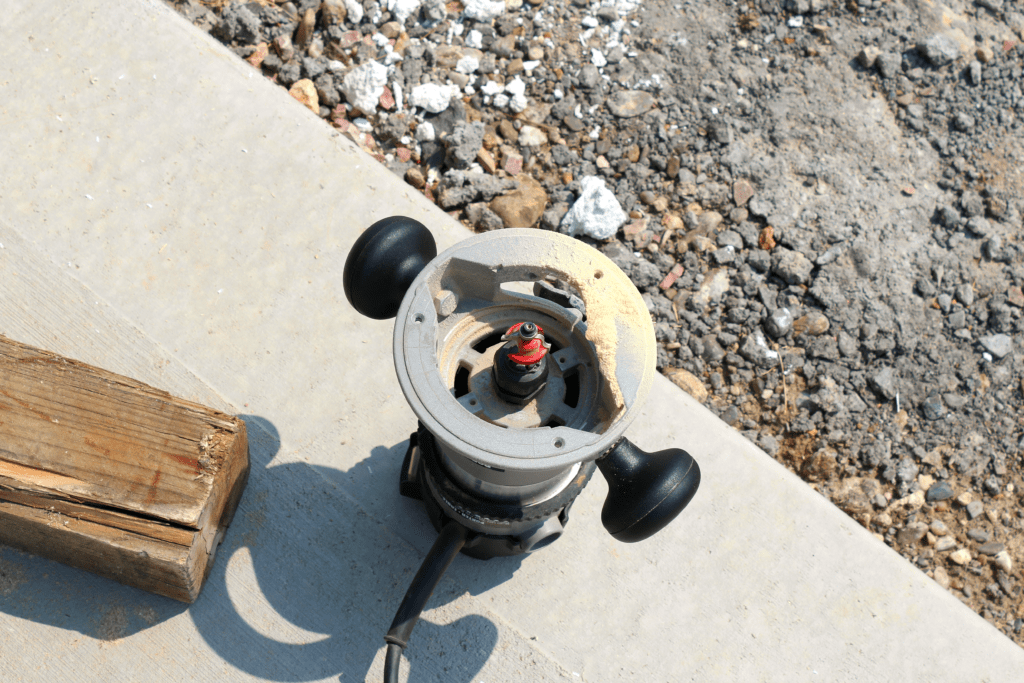
I used a handheld router to finish up the top edge of the banister. I like the rustic look so those imperfections are on purpose. Once you have finished any details on the wood, apply the Minwax Clear Satin top coat.
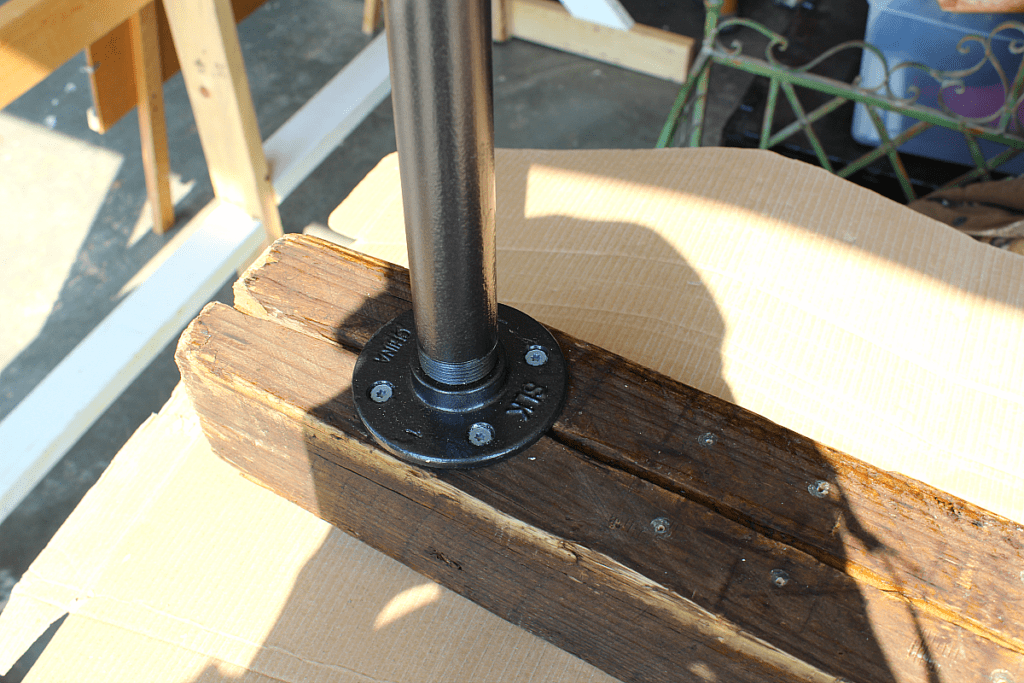 After your paint has dried completely on both your pipes and wood it’s time to start assembling. This should be done after you have figured out the rail spacing. Again, check for local codes on height and spacing (these pipes are spaced 5 inches apart measuring from the middle of one pipe to the middle of the next pipe).
During the initial assembly it worked best for me to attach the railings to the banister. I used a good sized screw (#8 or larger) with this project so I pre-drilled my holes. I connected them and left the screws a little loose and the pipe was only hand tight to allow for a more fine adjustment due to imperfections in the wood. Also, the way the pipes are threaded might allow more/less turns between different pieces, not a huge deal.
 Now you need to secure the banister to the floor. Let me tell you this was not the easiest task, but completely doable. Because our basement is unfinished, I secured the post from the basement side. I pre-drilled a hole through the bottom of the floor to the surface. Then, I had Sam hold the wooden post in place and drilled 2 large screws through the floor and up into the post.
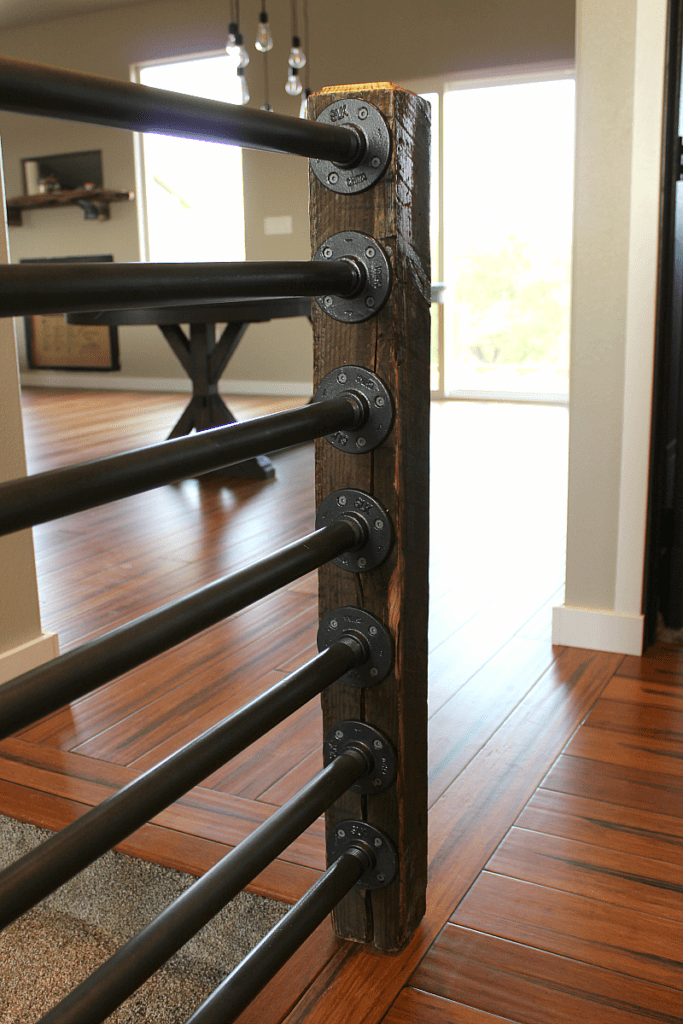
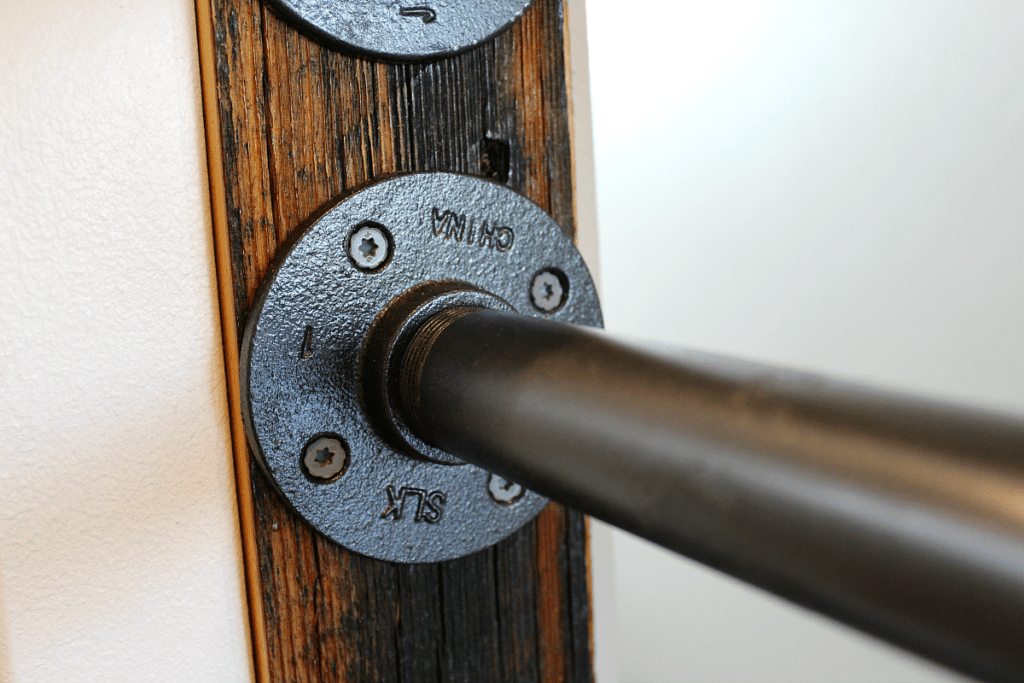
Now I began adjusting each railing by hand (because I left them only hand tight) against the wall. Make sure they are all snug. As you can see, the wall portion also has a piece of barn wood attached to ensure I had the railing good and secure.

Ensure they are all level and then attach using your favorite screws, I prefer torx head screws.
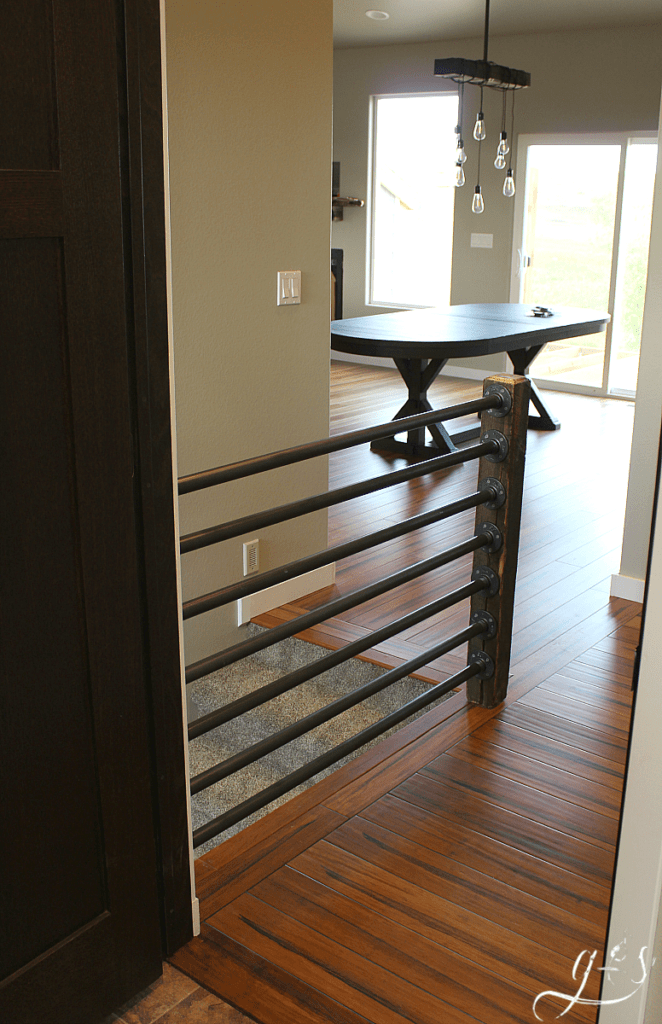
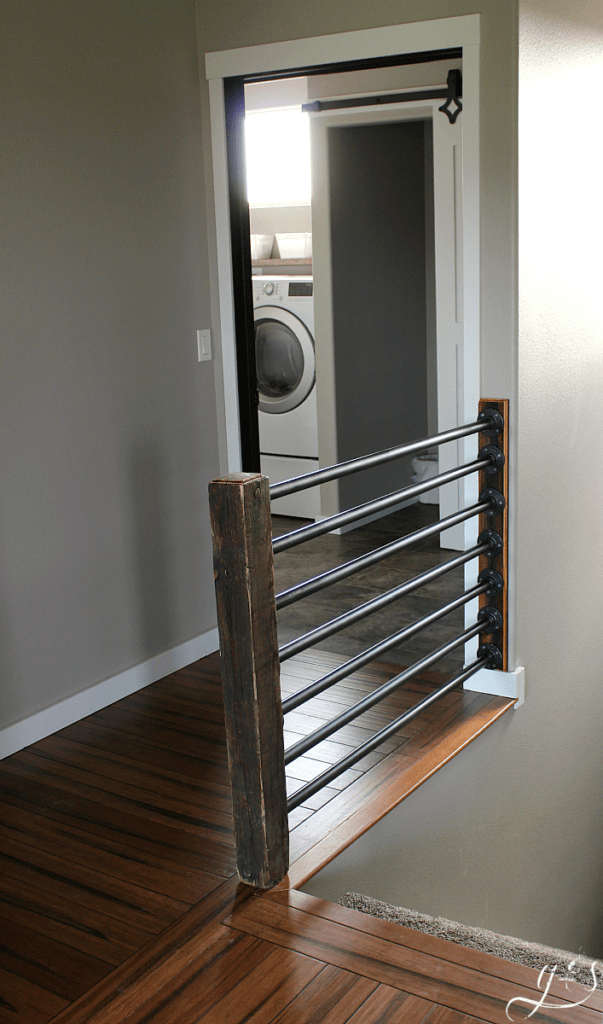
This is our final product. Just to note I was having fun using my router, so the wall piece also has a routered edge on it as well.

Looks awesome! Getting ready to do a similar railing. How is that paint holding up? Any chipping or wear?
Hey Lindsey! 4 years down and it still looks fantastic. No chipping or fading. The only time it has chipped is when the dog scratched the rail with his nails for attention. But I easily sprayed a q tip and touched it up. Other than that we have had no issues. Thanks for reaching out and best of luck with your project! You’ll love it. 🙂
If we can’t find threaded piping, would it work the same way and be secured, when connecting them to the wall flanges. When to our local Lowes and they don’t carry threaded
Hi Pam! I do not believe this railing will work without threaded pipe. Is there another hardware store you can check? Thanks for the question and let me know if I can help further.
A cheap way to get the pipe is to call a plumber or gas line installer and they can purchase the pipe wholesale for you and potentially cut it to length and re-thread it.
That’s a great idea! Thanks Jeff. We’ll go that route next time. Blessings!
How many inches are between each pipe?
Hi! From the middle of one pipe to the middle of the next pipe they are spaced 5 inches apart. I would check with local building codes for your area to be sure your spacing is up to code.
Beautiful banister. We are in the midst of installing one and about to paint the pipes. I think you said the black spray paint you used was Matte? Do you like the matte? Or would you have preferred high gloss? Are finger prints an issue with the matte? Thank you.
Hi Theresa! Thank you! We have been very happy with the banister. Yes, we love the matte finish and I do not notice fingerprints. Believe me, fingerprints do bother me on our “smudge proof” stainless steel appliances, but I have not noticed them on the banister railings. We wish you the best with your new banister! I am sure it will be beautiful!
I want to do this on steps going down like in a open basement, open stairs coming onto the main floor from upstairs. How do I tie in a slanted post into the flange? Thank you.
Hey there! Sorry it has taken so long to get back to your question. There are a couple different options to match the angle of your stairs. Try to determine the angle of your stairs before you begin. When you know that you can pick from a few ideas. 1) They make fittings that are at a 45 degree or 22.5 degree angle. If those are close angles and you don’t have a large span then you may be able to get away with using these fittings. 2) If you have the space you can place your pipe flange on the inside(towards the stairs)of your post then match the angle down to your landing at the wall or another post. 3) If you don’t have the room to place the pipe and fittings on the inside of your stairwell you can you can use two 90 degree elbows connected together with one end to the flange and the other end connected to your pipe, use a short nipple in between your two 90 degree elbows. Let me know if you have more questions. Good luck!
Love the look of this. How did you attach the post to the floor? Thanks!
Hi Gretchen! Here is how Ryan mounted it: “Now you need to secure the banister to the floor. Let me tell you this was not the easiest task, but completely doable. Because our basement is unfinished, I secured the post from the basement side. I pre-drilled a hole through the bottom of the floor to the surface. Then, I had Sam hold the wooden post in place and drilled 2 large screws through the floor and up into the post.” Do you need further clarity or other ideas to mount it?? Thanks for the question!
What did you buy for the piece that is flush against the wall? I love this!
Hi Nicole, they are actually steel wall flanges that we spray painted. They should be near the steel pipes at your local home store. Blessings!!
How many inches is the spread? Is it up to code?
Hi Sara,
Yes, this railing is up to code. There is a spread of 4 inches between the bars, meaning a ball 4″ or larger cannot fit through. I hope this answers your questions. Please let us know if you need additional information. 🙂
You didn’t indicate/show how to mount the post securely, as it takes most of the burden. What did you use to mount the post to the floor for structural security?
Hi! Here is how Ryan mounted it: “Now you need to secure the banister to the floor. Let me tell you this was not the easiest task, but completely doable. Because our basement is unfinished, I secured the post from the basement side. I pre-drilled a hole through the bottom of the floor to the surface. Then, I had Sam hold the wooden post in place and drilled 2 large screws through the floor and up into the post.” Do you need further clarity? Thanks for the question!
How would I attach the post if I can’t get under it in the basement?
Hi Ashley,
SO sorry this reply is delayed. You can buy a metal post anchor for the bottom of the post much like posts on a porch. Then you can glue trim pieces onto the metal to make it look finished. I hope that helps.
Hello and good job,
What is the diameter of your tubes
Thanks
Thank you! The pipe is 1″ in diameter. Blessings!
Great look. How did you get the rods to the right size? Do they have to be threaded to fit in the wall mounts, or did you drill a hole in the posts and inset?
We had measured the length of the area that required the railing. Our local home store sells the pipe in one foot increments. To make this project work we only needed 6′ pieces. So with the post, pipe and fittings it fit perfectly. We used Wall/Floor flange (round piece with four holes) at both ends. Then we were able to secure the whole thing to the wall and post. I did not have to inlay the flanges in the post. Sorry that was a long answer. But yes all pieces of the railing are threaded together. Thank you for asking and we are glad you like it! Please let me know if you have any other other questions.